How the Lamps All Started
Several months before this last Valentine’s day I was on a call with my girlfriend and I noticed a cactus in the background of her facetime. She had mentioned how she liked cacti, so this set in motion a series of events that resulted in me designing, 3D-printing and assembling a cactus lamp for her. The thought was that I could design a lamp to look like a cartoonish cactus, 3D print the lamp with a see through filament, and then fill the lamp with lights and an appropriate controller to allow for remote control of those lights.
My Initial (and Failed) Approach
At first I thought I was going to design everything from scratch, starting from LEDs and an LED controller IC (integrated circuit), and working towards a prototype circuit board with remote control capabilities. When I made these assumptions the project became far harder, ultimately leading me to realize that this approach was not feasible given my knowledge and the amount of time I had. This is probably for the best anyways, because whatever I made would likely be a fire hazard just due to me not knowing what good design practices for such a device would look like. As a result, I dropped the idea of doing everything from scratch to finish the project by Valentine’s day.
The Far More Successful Approach
After I realized the short comings of my previous method, I pivoted and found an OTS (off the shelf) product that could power and control an LED strip that I could just put in the 3D-printed portion of the lamp. This also had the benefit of giving far more features than I could have designed myself within the timeframe of the project. Maybe one day though I’ll take a stab at making my own controller, but for now, I chose the safe and far more functional option.
Design of the Lamp
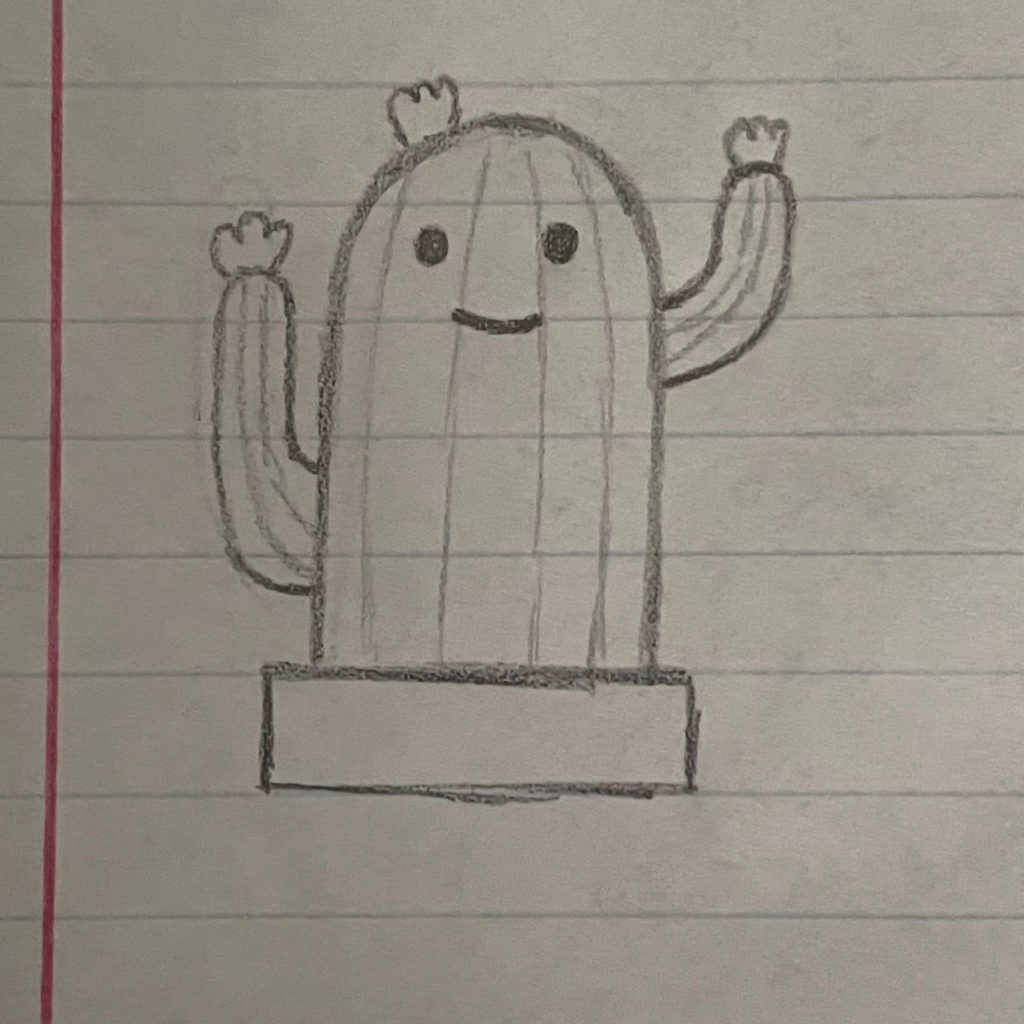
The lamp went through several design stages. Once I had the idea stuck in my head I made a simple sketch:
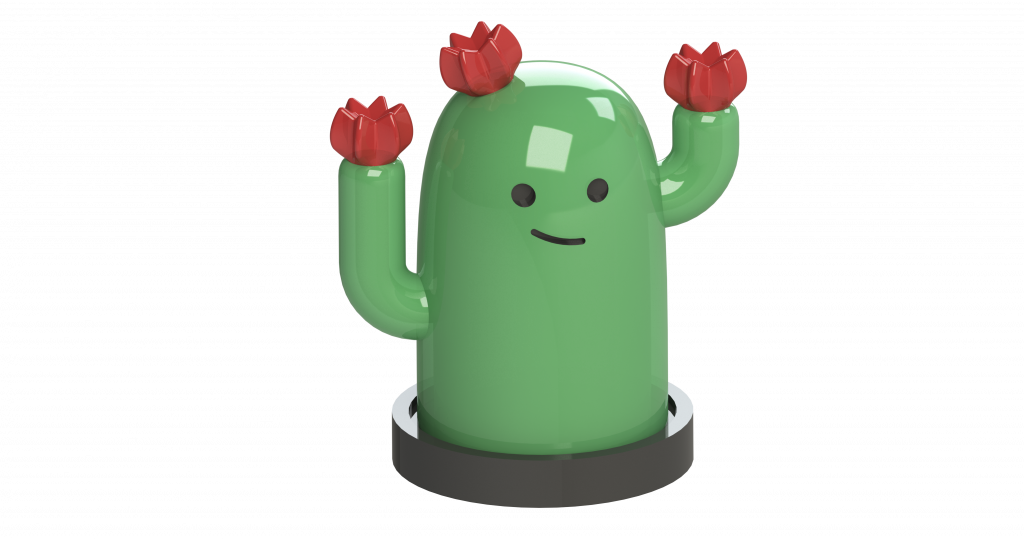
At this point I started working on the CAD (computer aided design). Early on, during my idea formulation, I made a few different cactus CADs to get a feel for what I was able to design and what a final product might look like. At this point I bought the OTS LED controller, and using my calipers, was also able to make a model of the LED driver and the associated cords. This was so I could insert them where needed into the model to check for tolerancing and accessibility during assembly. Here was the final render of visual aspect of the system:
Printing and Lamp Assembly
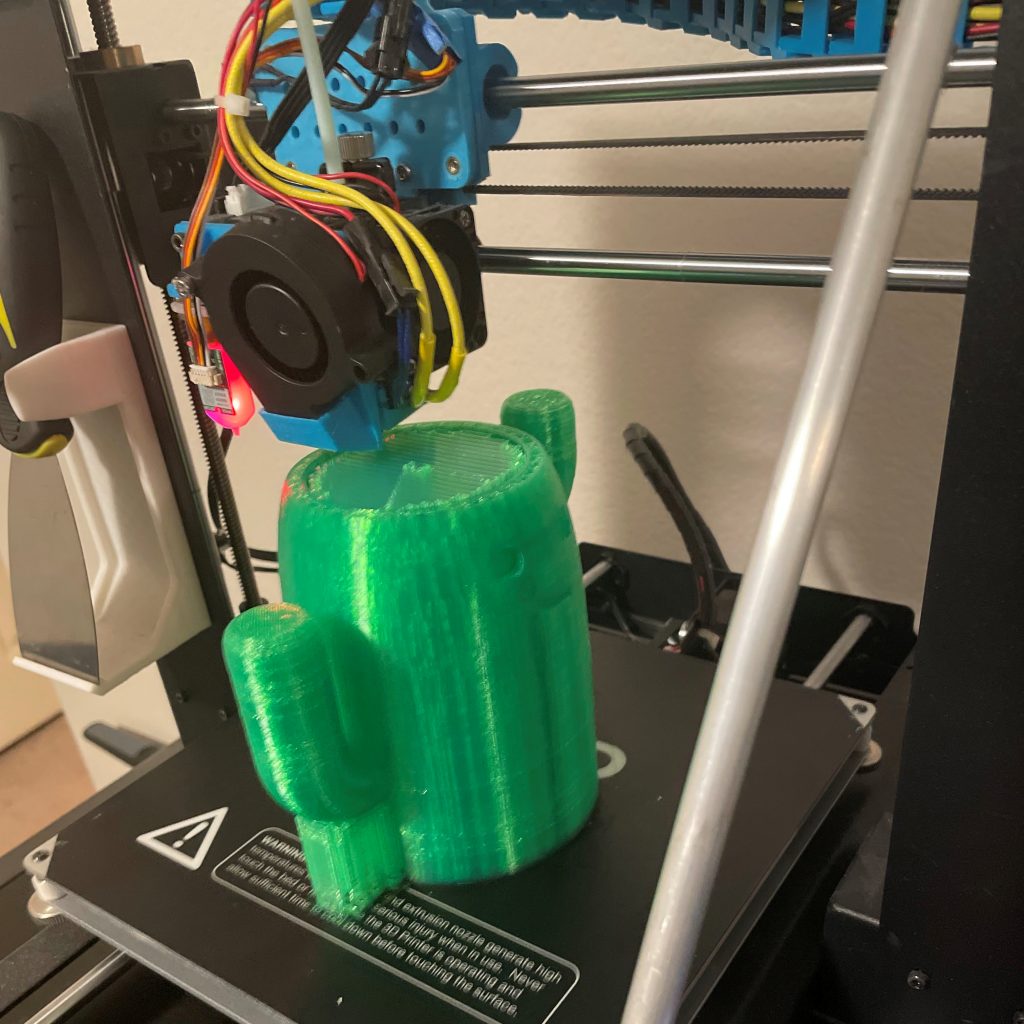
While I was still completing the CAD, I started 3D printing parts I had finalized. This allowed me to streamline the process. My worry was that my printer was going to fail on some of the prints (at this time I hadn’t tuned it particularly well, this is something I’ve been working on), but fortunately I only had a few issues early on. Here is one of the parts as it was getting printed.
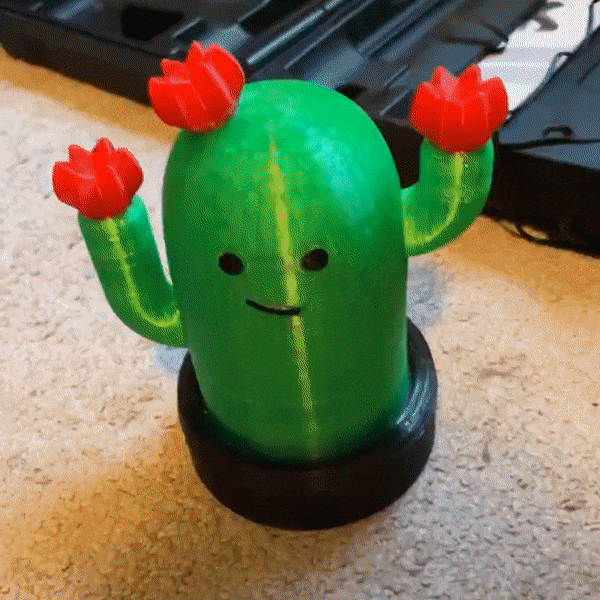
Unfortunately due to rushed assembly, I forgot to take many pictures of it as I made it, but here is a gif of the final product lightening up for one of the first times.
The Later Lamps
Totoro Lamp
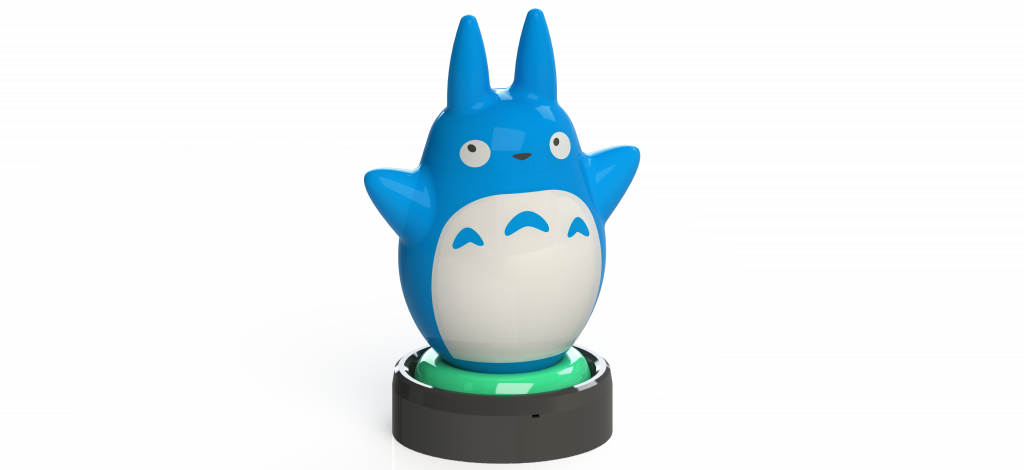
After the, I do say so myself, astounding results of the cactus lamp, I figured I could make my mom something similar for mothers day. However, my ambition got the better of me and I decided to try an ambitious lamp model. Both my mom and me are avid Studio Ghibli fans, so I decided to make a model of the blue guy from “My Neighbor Totoro.” Here is a picture if you’ve never seen the little guy.

The Design
Anyways, due to the shape of this, it did not lend itself to the parametric design that Solidworks offers; however, I decided to try anyways rather than learn blender or some other software. Despite it taking several days, I was able to finally make it. During the process I learned far more than I expected about surface modeling and how to mix that with solid modeling. I decided to use a nearly identical base as the last lamp and use the same LED controller due to the success I saw with that. I made a few small changes though just to optimize print times though. Here is the final render of the CAD:
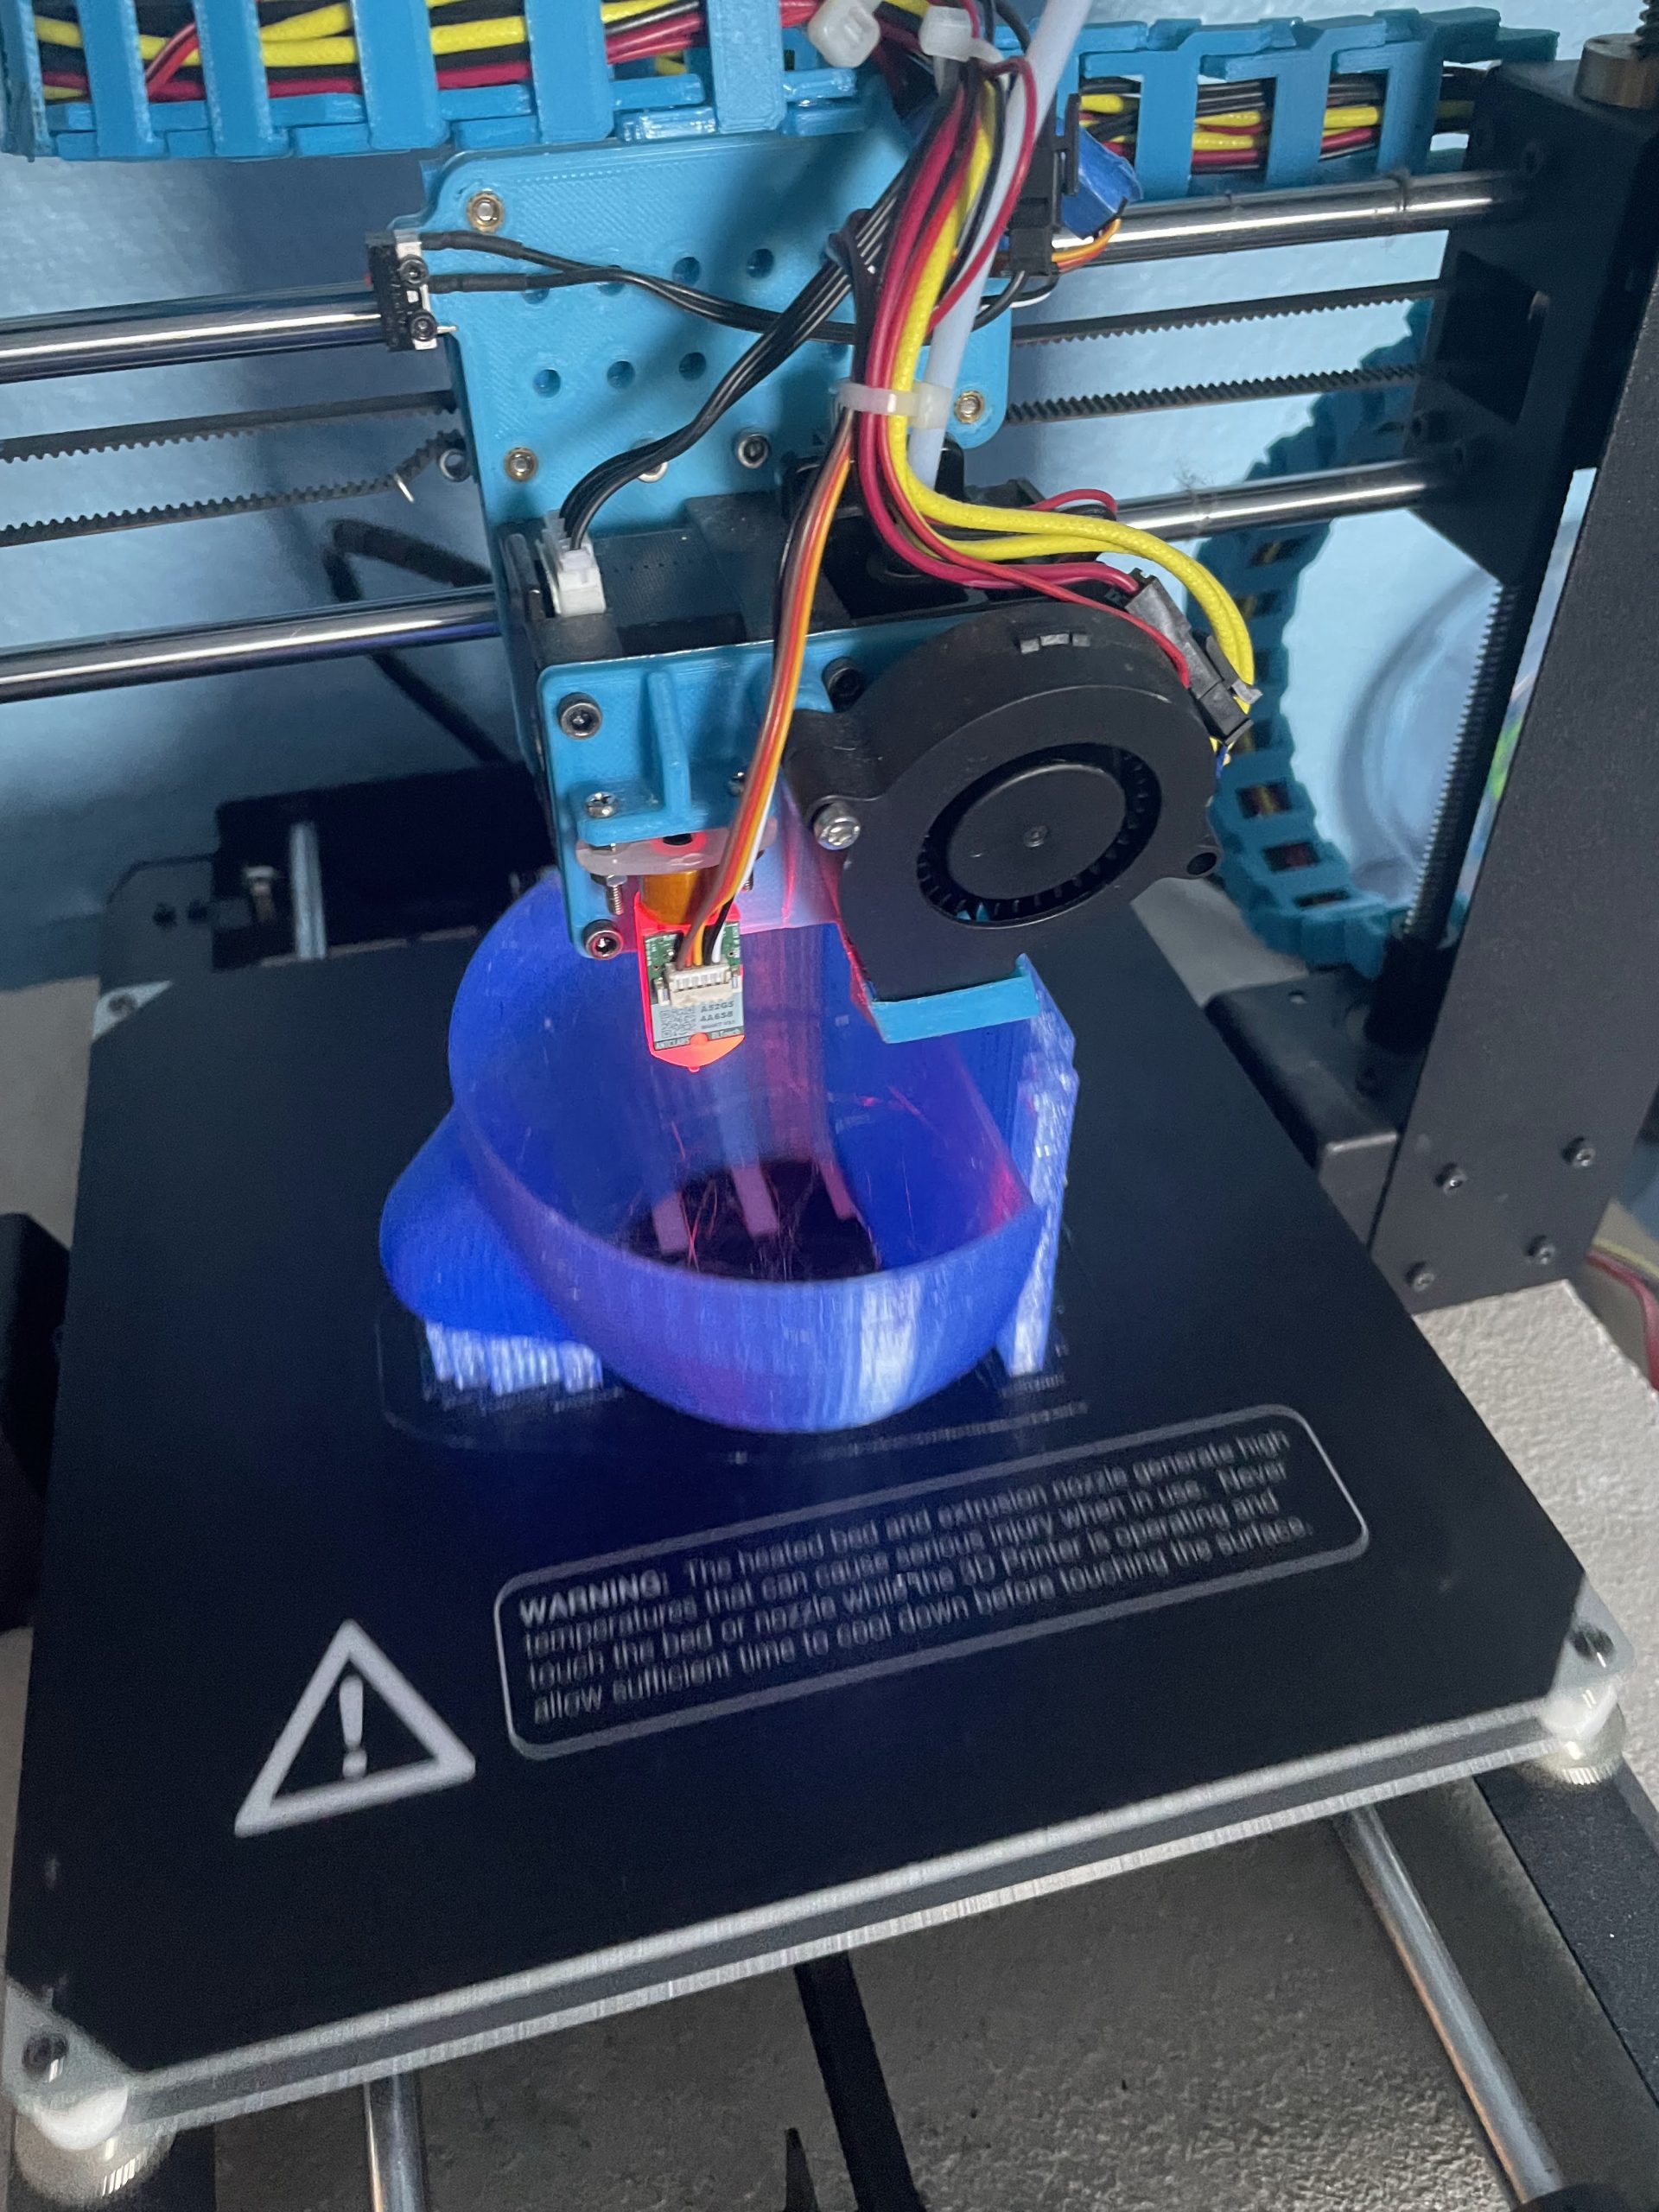
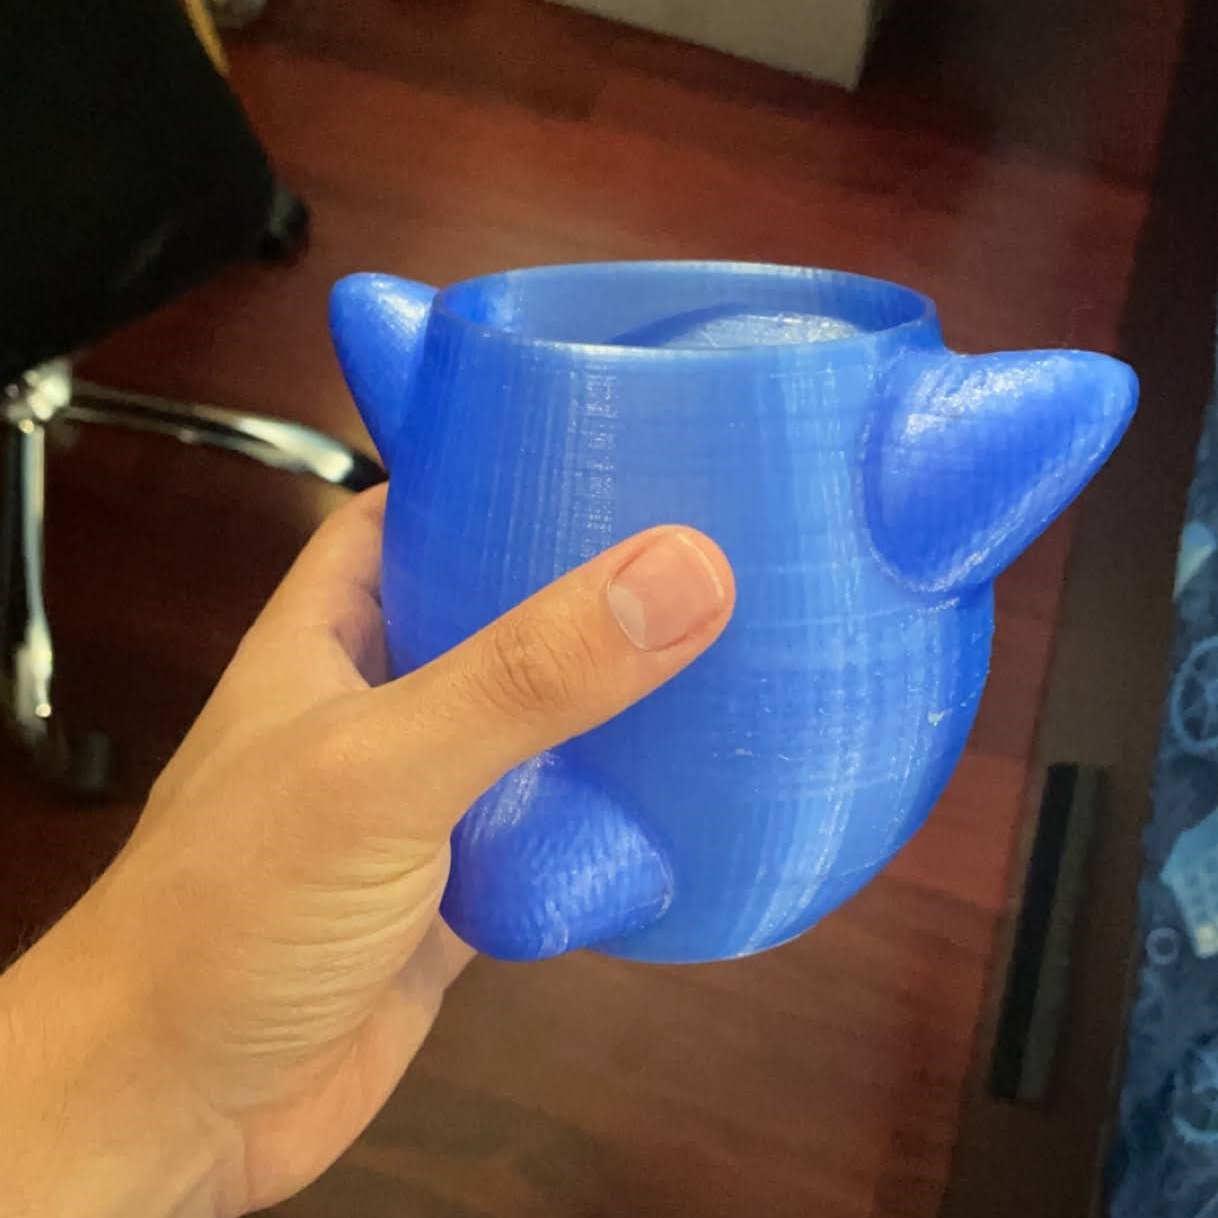
The Build Process
Here are a few pictures of the build process once I started 3D printing things and assembling it all with hot glue:

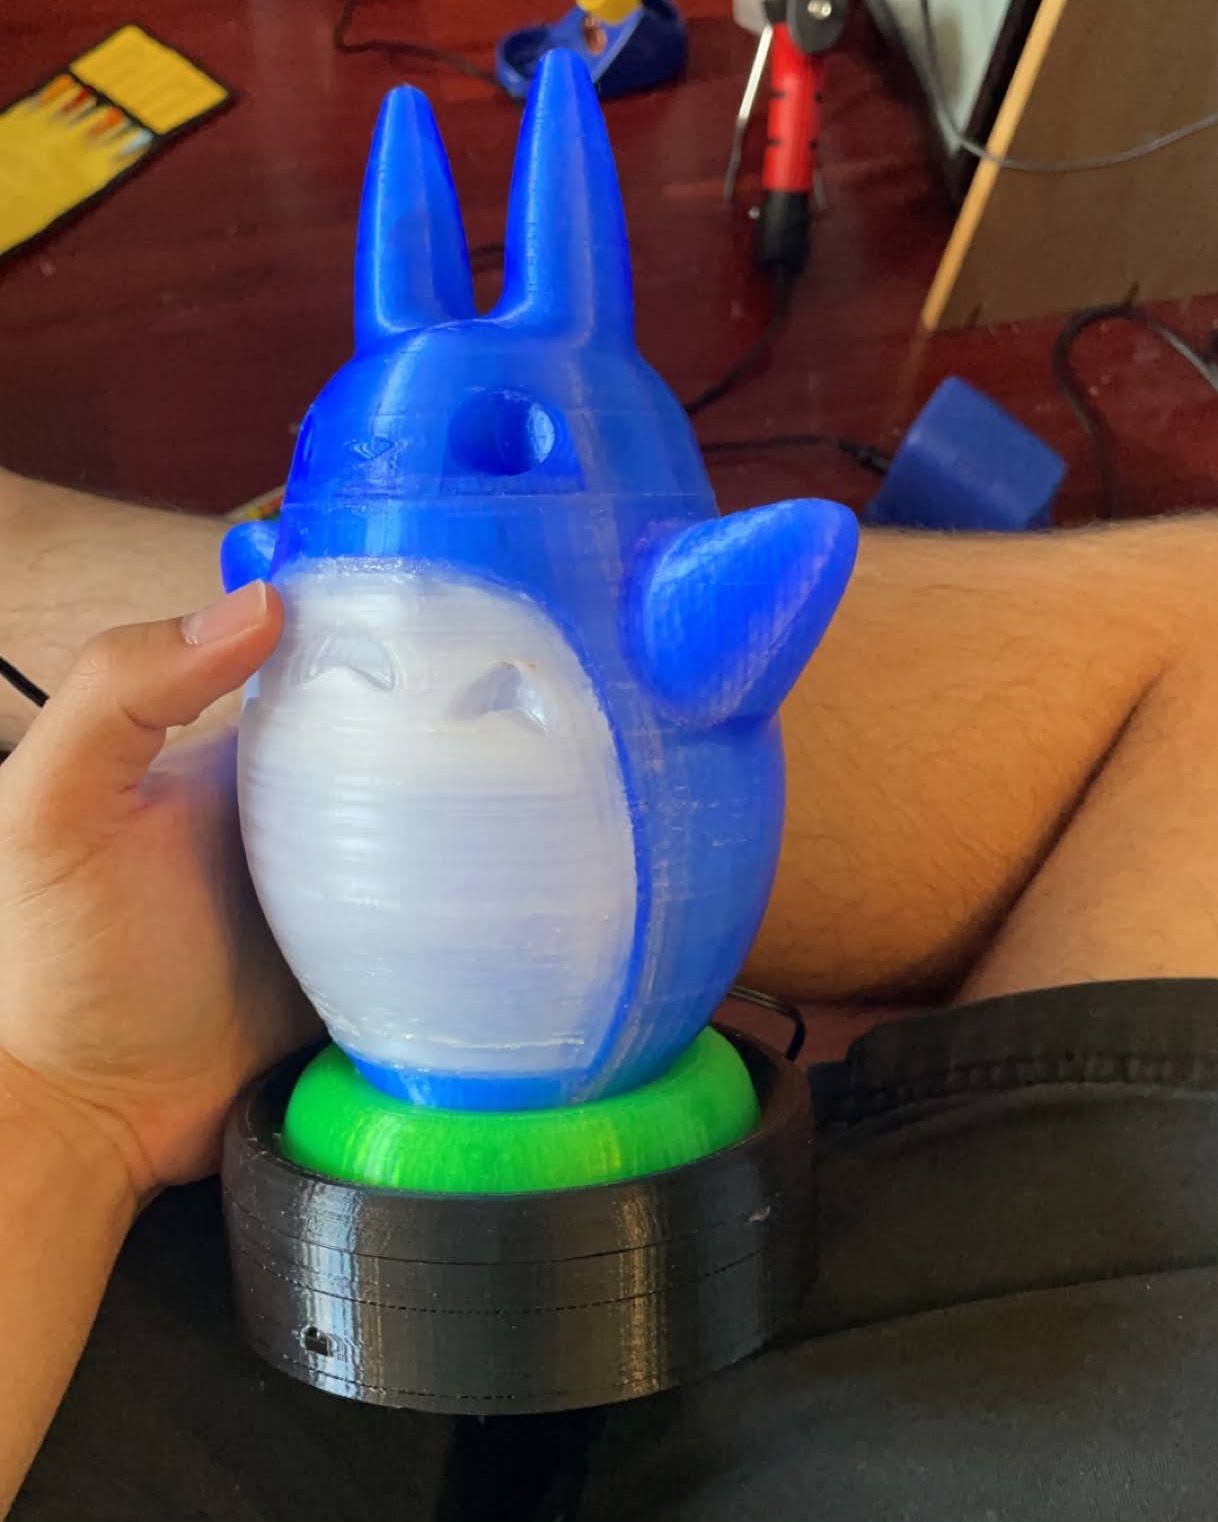

And here is the final product!
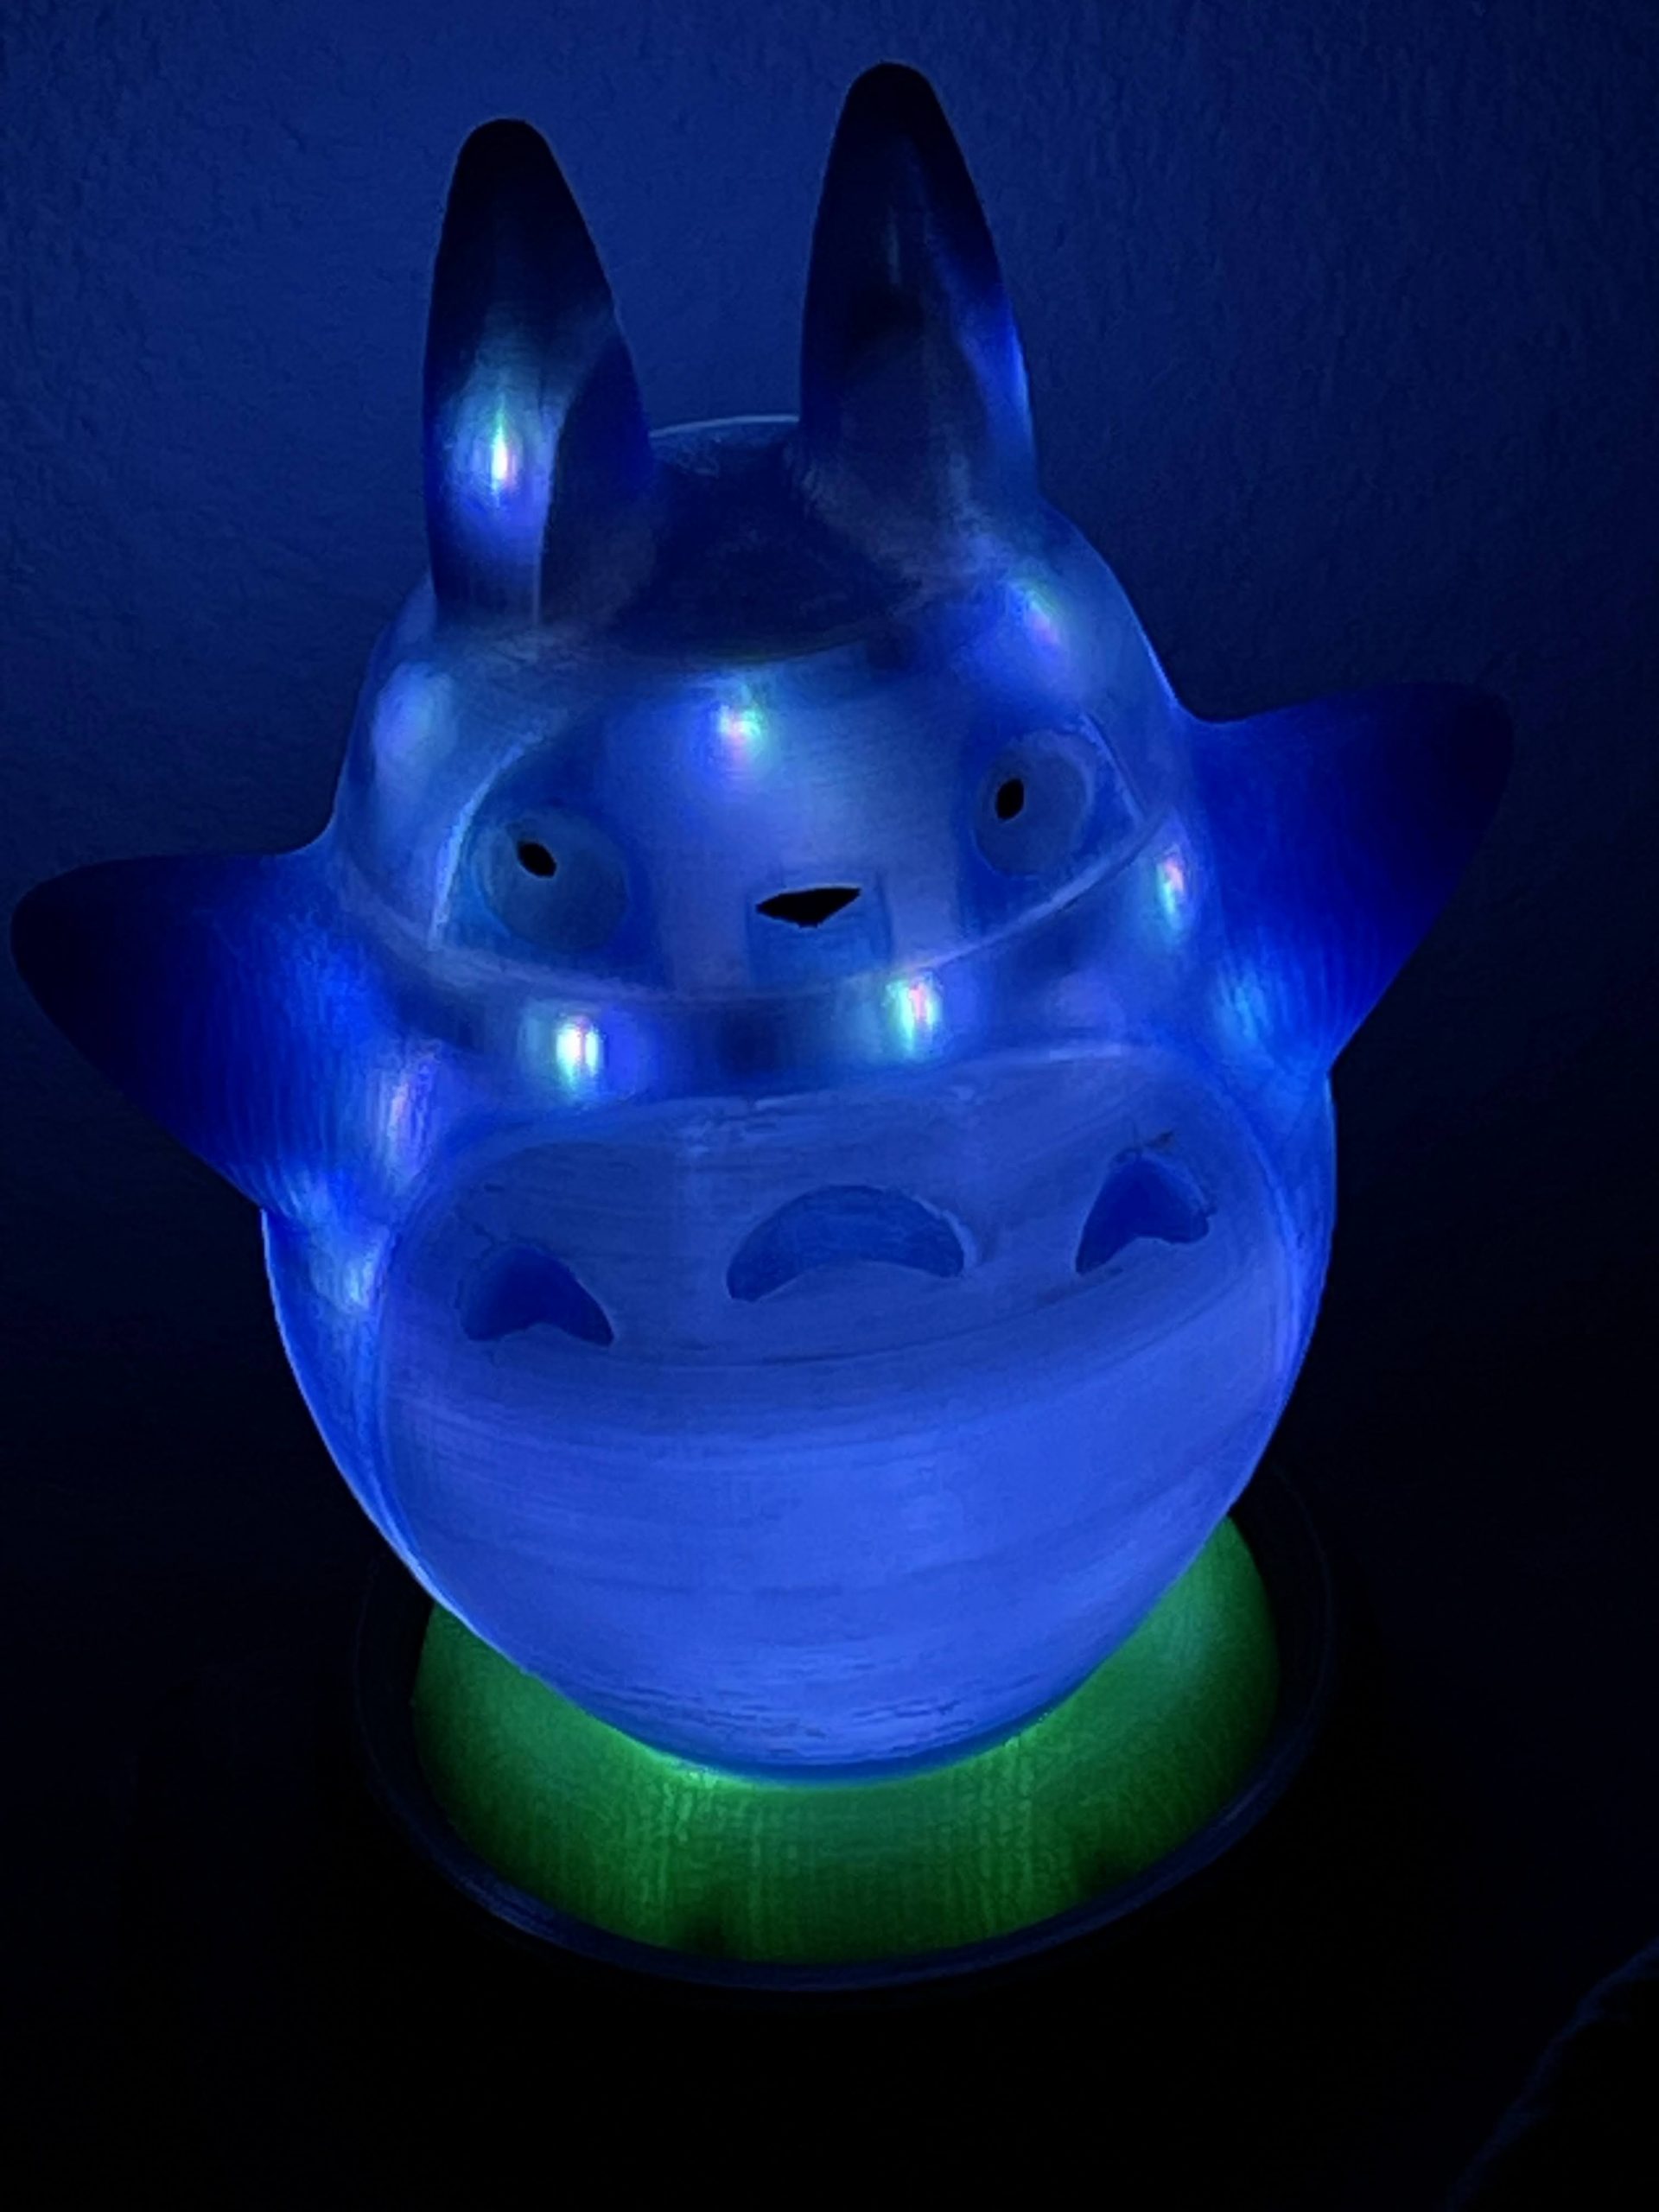
I think it came out alright, but I did learn a lot from this one. Due to print times, I made the walls thin, but as a result, the LEDs are not as dissipated as I would have liked. I think I could modify this in the future by printing with more internal structure as this is what really reflected the light around in the original cactus I designed. Also, I need to find more effective ways to fuse to 3D prints together. While using hot glue worked in my case, it still left relatively ugly seems, something I hope to be able to avoid in the future with my next lamp…
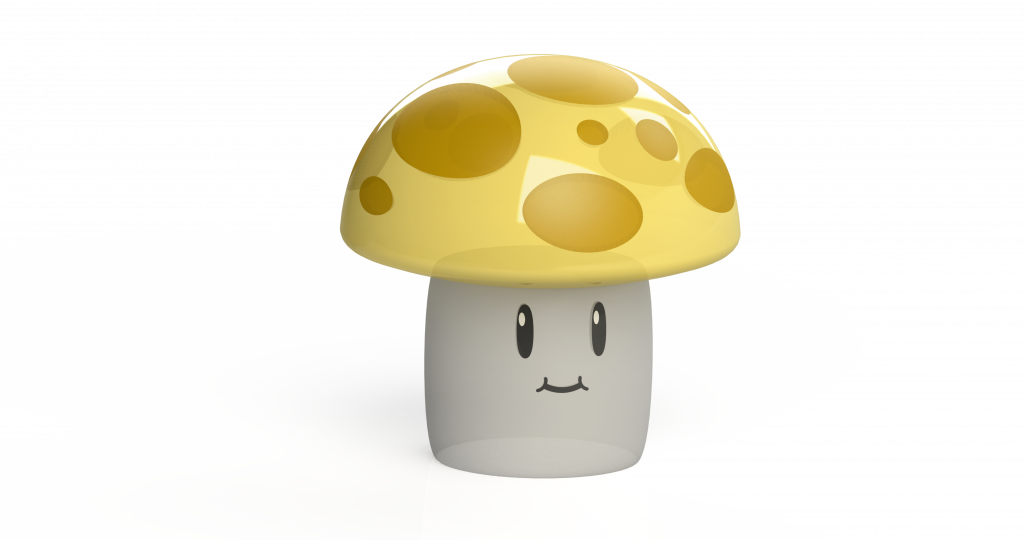
Plants Verses Zombies Sun-shroom Lamp
Around the same time I designed the lamp for my mom, I designed a lamp for myself. Having a really dim bedside lamp is super useful (especially with the remote), so I figured I’d make one. I’m an avid fan of an oldish video game called Plants vs. Zombies. In this game there is a plant called a Sun-shroom that I find rather cute, and I figured I had the skill to bring them into the real world. After CADing for bit, I got to this, which I’m pretty happy with:
I’ll post updates on this as I go, but as I ordered a package to the wrong address (the problem with moving a lot!), I won’t be able to work on this one for awhile.
So There We Go!
Wow! That was a lot of effort. I’m relatively happy with how everything came out though, and if anyone reading this is interested in getting CAD files, let me know in the comments. I could also provide a list of the parts and anything else needed to replicate what I’ve done. Signing off for now though! I hope to be back here in less than 3 months… unlike this time *sigh.*