Things have been crazy lately. School had been beating me into the ground (I got the grades I wanted at least…), I programed a robot (post to come soon!), and I continued working on a bunch of small projects I have been meaning to get to forever.
Project 1 – Desk Modification
A problem I have had for awhile was that my desks were not large enough for all my electronics. I originally had this complicated design that I was going to make, but I realized this would be very difficult to assemble and not leave enough scrap wood for my other desk which also needed some extra space. Here it is after I assembled it. Going to stain it when I get another chance, but it’s been wet outside (at the time there was a hurricane), so I’ll be doing that later.

This left me with some extra wood that I used for a design for my other desk. The design was definitely over built, but I didn’t want it to sway too much (heavy equipment will be going on top) and I figured I could attach things to the sides later. I got the sides machined by send cut send, which was admittedly a bit pricy for the powder coating, but they look amazing!

I have yet to assemble everything, but I’m looking forward to even more flat space to fill…
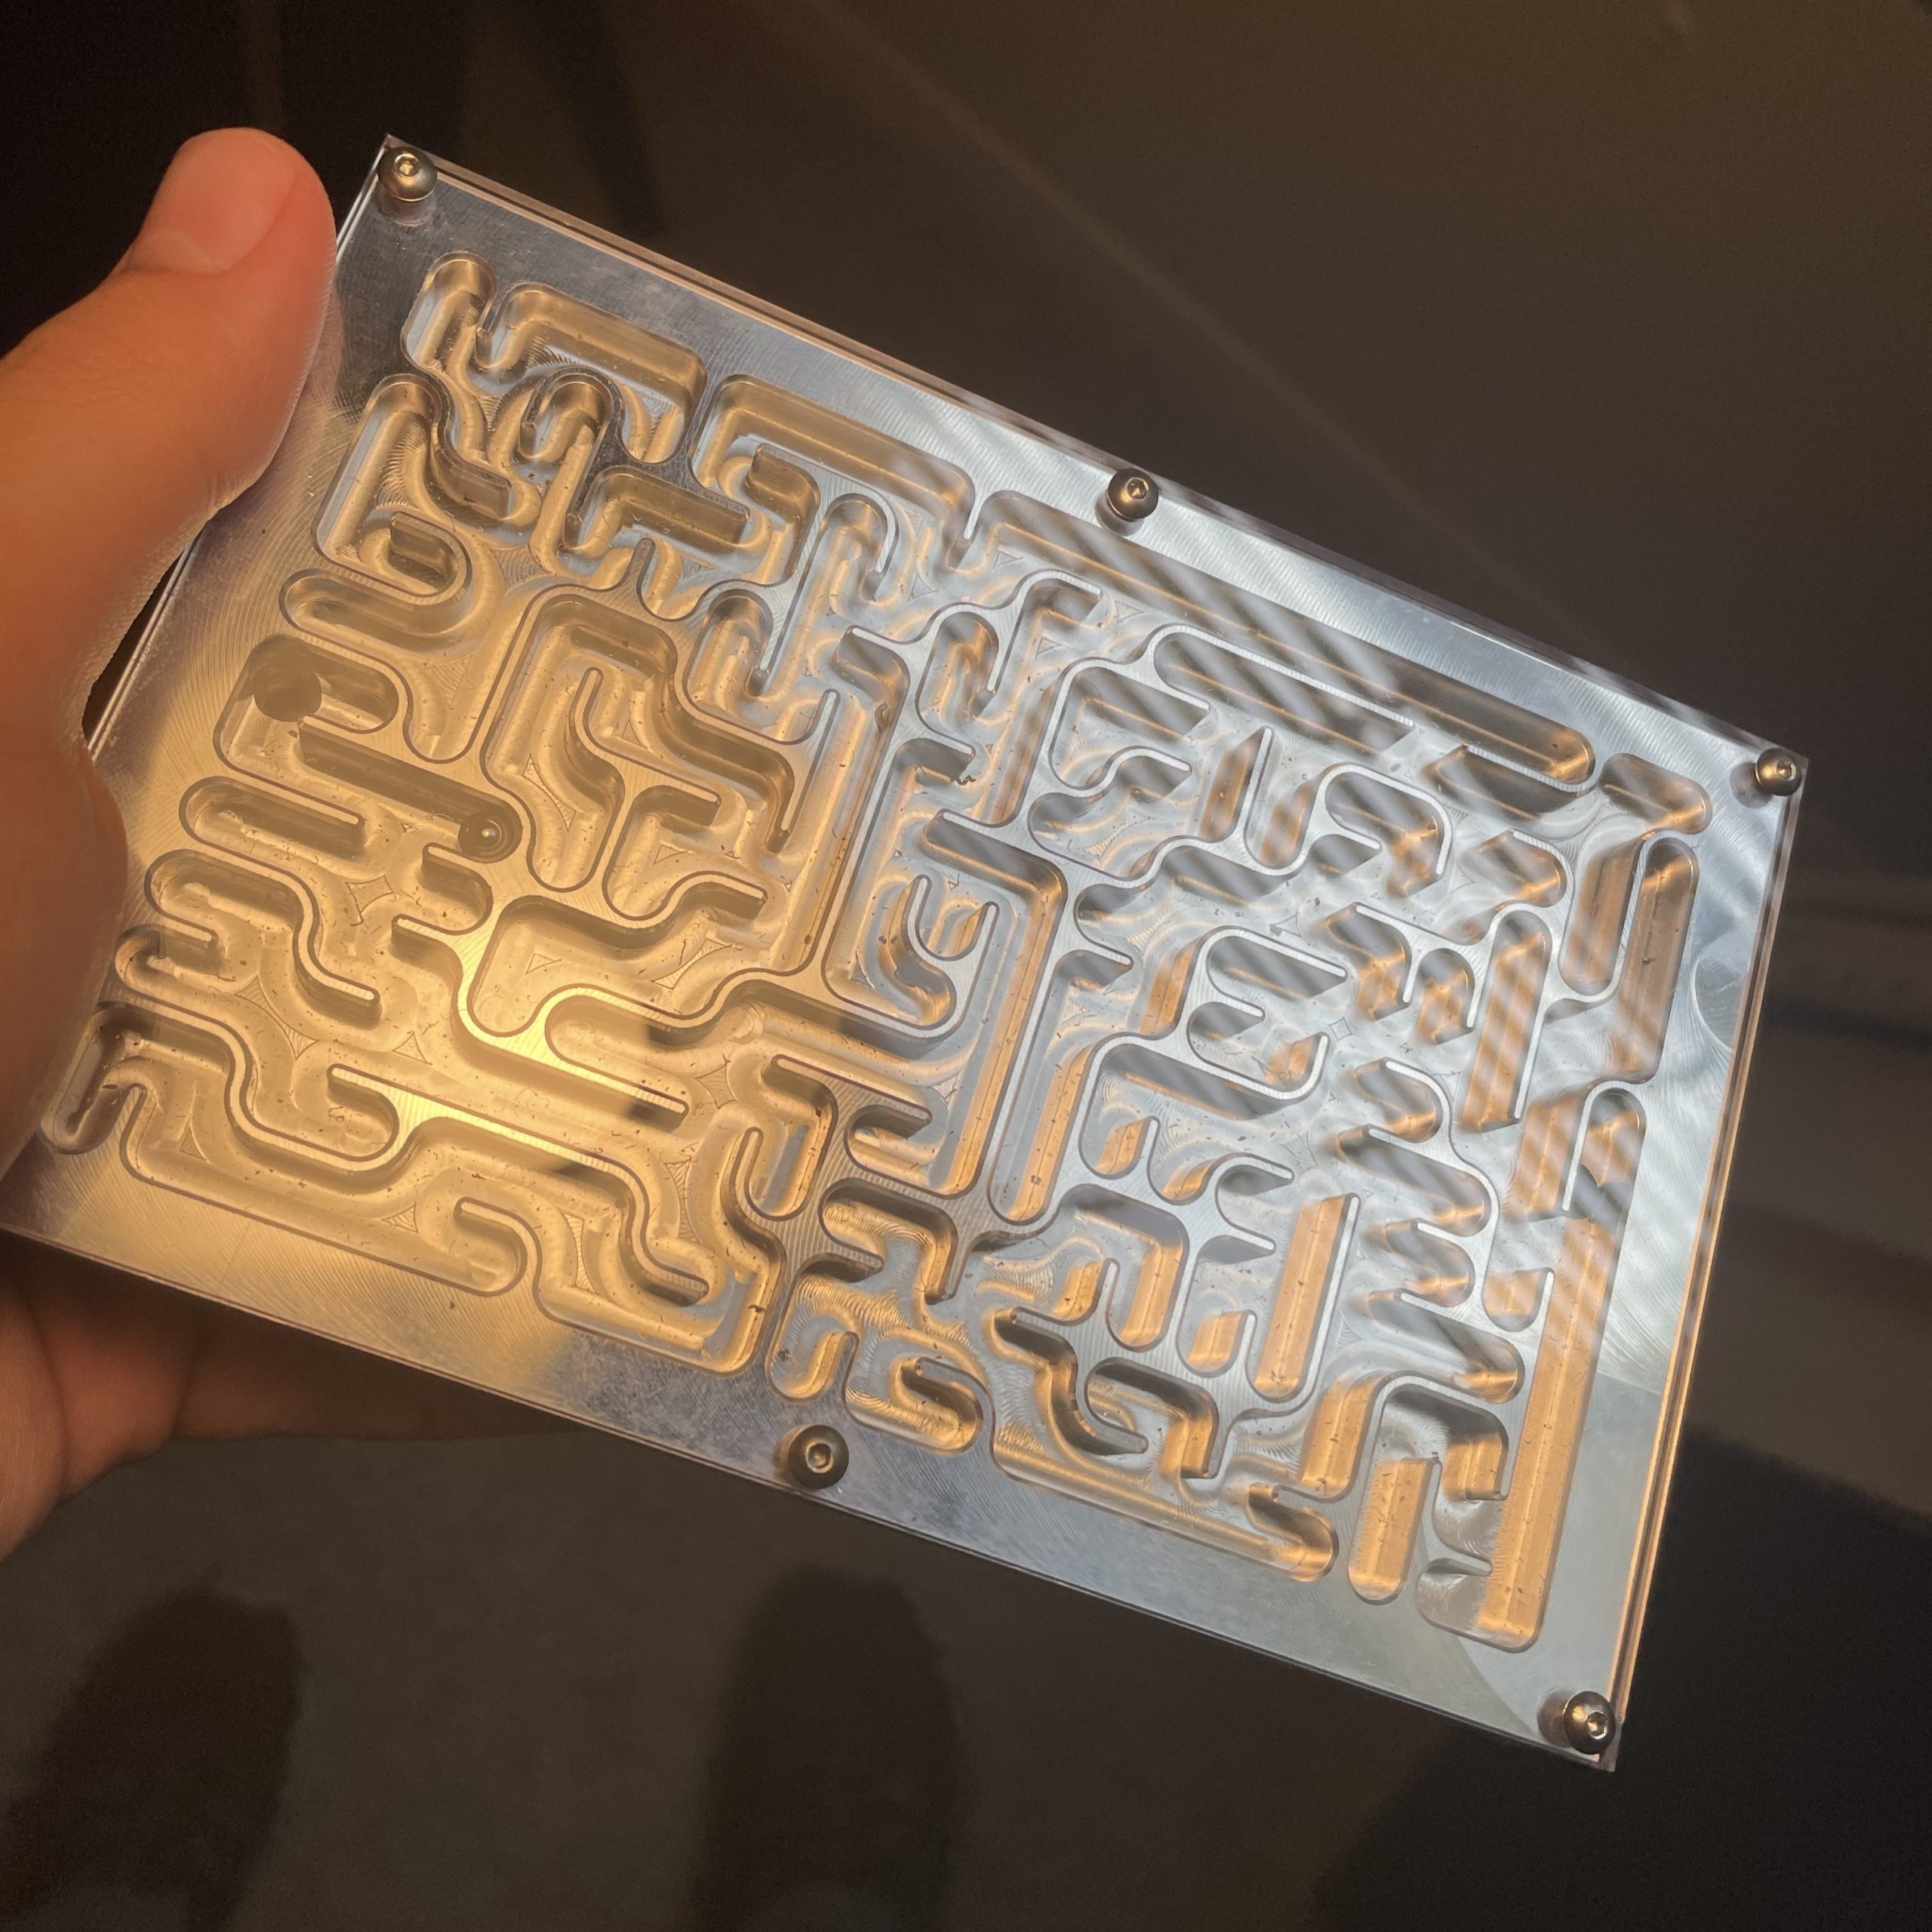
Project 2 – The Maze
During my production engineering class we learned how to use the HASS vf3. This machine was scary to say the least, and even with the caution that came with that, we still hit the vise with the end mill… guess I know to check for clearances on the floating jaw in the future now. During that class I designed a maze for my group to machine using Fusion 360 CAM. Here is a render I made of the maze. There are holes between the two sides, so as soon as you solve one maze, you can flip it to solve the other side!

Here are some videos of the part while it was being machined too! Bit hard to see what’s going on, but I thought it was still pretty cool.
Because the class ran out of plastic polycarbonate covers to use, I got some also machined from SendCutSend.

Here is the final thing all put together.

Also, here is a video of the ball inside the maze. I was really happy with the final product!
Project 3 – Test Part
Another project I did in the production engineering class was a test 5-axis part. While we could have easily done this on a 3-axis, this was just to see what we could do with a Pocket-NC. Here is a final picture of the part.

And here is a time lapse I made of the machining process. Pretty happy with how it all came out!
Project 4 – Fixing My 3D Printer
This is a message for my future self and everyone else who might have similar issues to me. I used the BIGTREETECH SKR V1.3 board for my 3D printer controller and it has mostly been a good experience (save for the fan controller burning out as mentioned in a previous post). There was a recent problem though, with the controller randomly disconnecting from the UI screen.
This would cause issues with temperature control during startup and a host of other issues, so I had to fix it. Doing that took a long time though. I ended up having to update all the firmware and reconfigure some peripheral settings. The root cause was the UART serial speed though. I had previously set it to a baud rate of 256000, so I lowered it to 128000, fixing the connection issues. I am not sure why this issue randomly popped up, but I’ll make sure to keep this sort of problem in mind for the future.
Project 5 – Auto Watering Device!
Another thing I did sort of randomly was make an auto watering device for my plants at my university apartment. I found it was sort of a pain to bring them with me on the drive home, so I decided to set up an automatic pump system with a reservoir. In about an hour I had a working breadboard and an Arduino Nano program that would periodically turn it on every 24 hours for a set amount of time.

I set it going over Thanksgiving break and it worked perfectly! Made me very happy. This gave me enough confidence to leave it running over winter break, so we’ll see how that goes. For those wondering why I didn’t use a moister sensor, I had heard way too many bad things about them and determined that using a timer would likely be more reliable and far cheaper. However, if anyone reading this knows of a reliable option, I would be very interested in hearing.
What to Expect Next Blog…
I finally got the ICs, PCBs and the stencil delivered!

I will not get to these till I get back from winter break, so I wanted to make an update post specifically regarding the work I’ve been doing on Frank the differential drive robot! I’ll try to get that post up tomorrow as I have been working on it in parallel with this post.